![]()
![]()
![]()
![]()
|
|
|
|
|
In the manual matching and fusion mode there is  tab with a Capture button. It serves for saving the fused images in different formats. It displays a dialog window as illustrated in the example below.
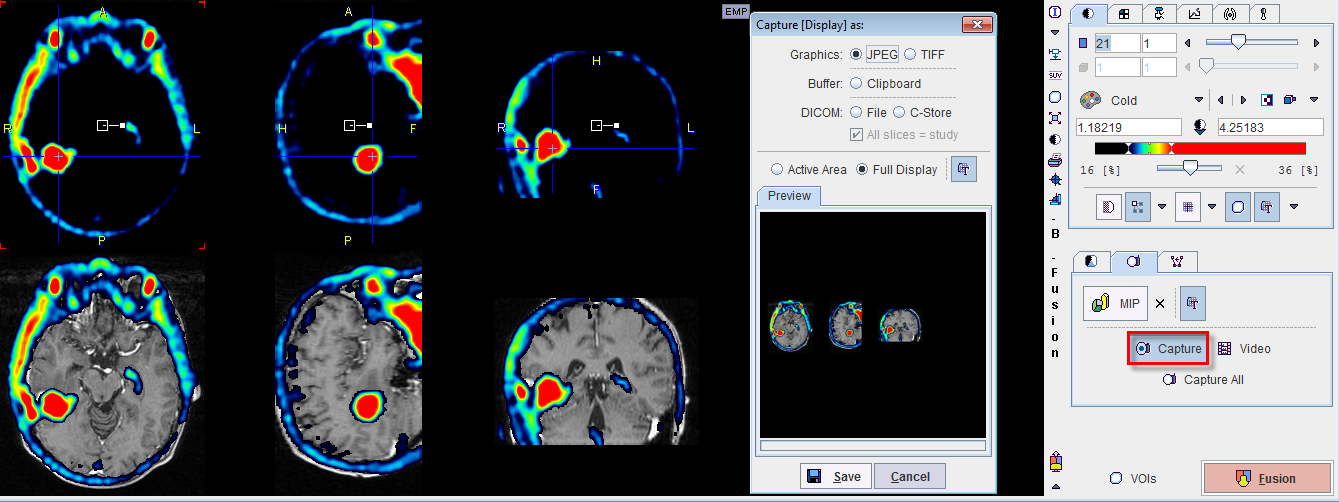
Note that the Active Area (image with red corners), or the whole row (Full Display) can be captured. Similarly, the Capture All button creates a capture of all three rows.
The output format can be chosen as follows.
JPEG, TIFF |
The generated images are saved in the corresponding graphic format to a disk location. With these selections an additional radio box becomes active: Active Area: uses just the active slice in the current presentation, eg.
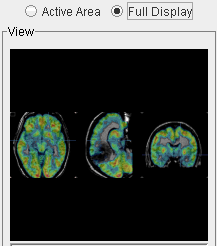
Full Display: uses the whole row, eg.
|
Clipboard |
As above, but copies the graphic to the clipboard. After that, it can be pasted into a different program such as MS Word or MS Powerpoint. |
DICOM File |
With this selection, the images are turned into DICOM Secondary Capture objects, and can be saved to disk. In this case, zooming is not considered, but the full images are used. The DICOM output has an additional box All Slices. If it is checked, a fusion object is generated from all slices in the study, otherwise only from the currently active slice. |
DICOM C-Store |
As above, but the generated DICOM objects can directly be sent to a DICOM server which can be selected from the list of configured DICOM nodes. |