![]()
![]()
![]()
![]()
|
|
|
|
|
Instead of showing individual slice images, a volumetric data set can be volume rendered. Simple volume rendering can be enabled in the 3D sub-pane
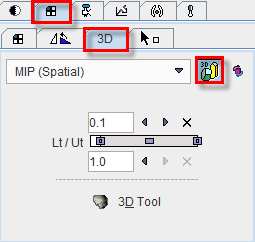
There are four methods to choose from the selection
As soon as the rendering button indicated in red is activated (or CTRL+V on the image) the image display switches from slice display to volumetric display, with the projection direction orthogonal to the image plane. Three renderings of an example PET using the same color table are shown below. Note that the value range considered in the renderings is somewhat different.
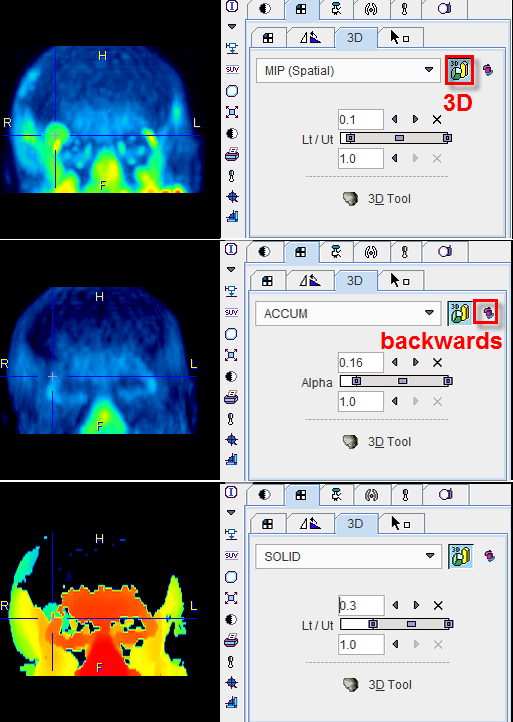
The button to the right of the 3D selection is a toggle to perform the 3D operation from backwards, which will result in a different image in the case of a depth-dependent weighting function.
Note that image scrolling is still enabled in 3D mode. When CTRL+Drag the left mouse button over the image, the 3D rendering disappears and the slice images are shown until the mouse button is released.
Rotating MIP
To create a rotating coronal MIP movie please proceed as follows:
MIP images will be calculated from different viewpoints and displayed as a rotating cine. If you would like to save a movie, enable the saving button as explained in Showing and Saving Movies.
Transfer to Full 3D Rendering
The  button in the 3D pane is only functional if the PMOD 3D option is installed. When this button is activated, the current data set is loaded into the full 3D rendering tool for advanced processing.