![]()
![]()
![]()
![]()
|
|
|
|
|
Non-DICOM Images
The Original Images page also contains a Load Images button for loading images in different formats.
Image Reviewing
The original patient images can be reviewed on this page. Please refer to the PMOD Base Functionality Guide to find out how to change layouts, colors, print reports, etc. The example below shows the orthogonal layout, but tiling arrangements are also possible.
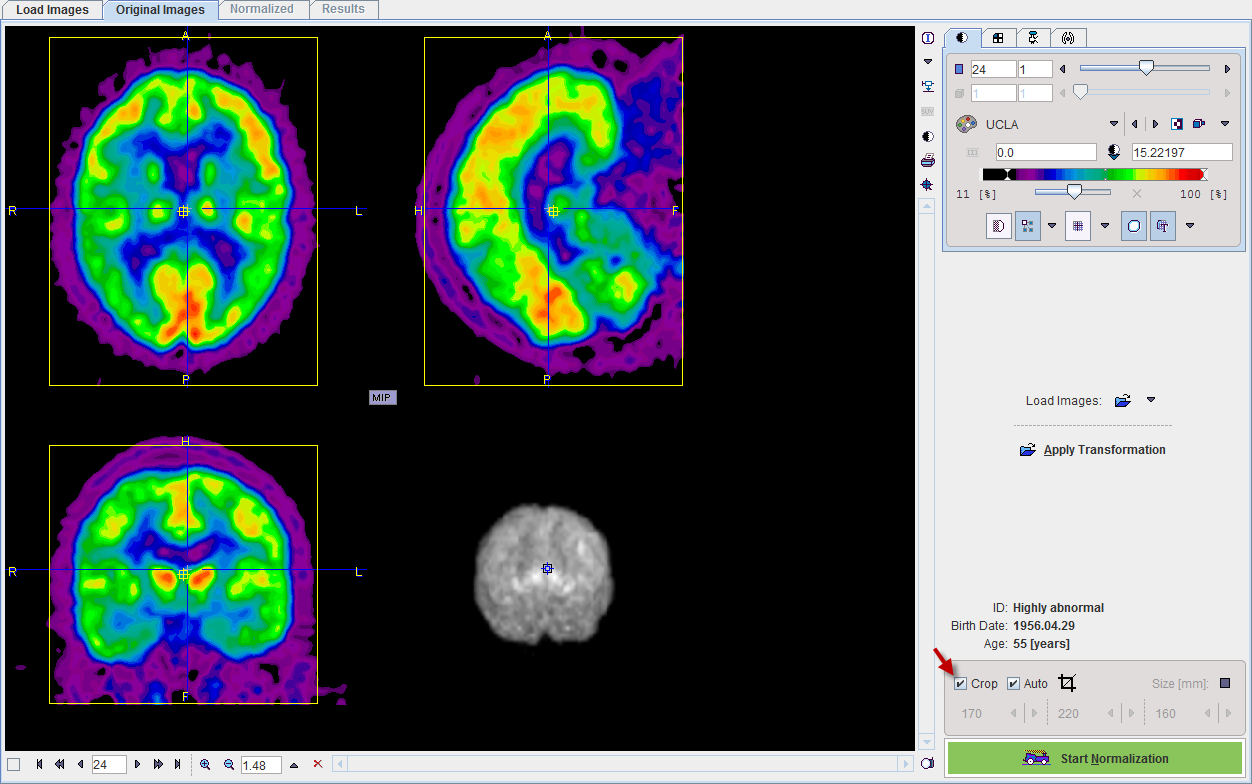
Image Cropping
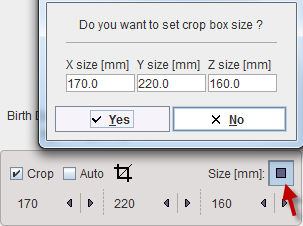
If the image volume covers much more than the brain, it is advised to crop the data set to the brain. To do so, enable Crop. A yellow crop box appears which can be adjusted by clicking at the center of the brain. If the box size needs a change, use the arrow buttons to incrementally increase/decrease the edge length in a certain direction. Alternatively use the button indicated below and change the edge lengths numerically.
If the Auto box is enabled, the program tries automatically determining an appropriate cropping volume. Cropping can be executed explicitly with the  button, but will automatically applied when progressing with Start Normalization.
Applying Transformations
In the extended mode it is possible to save the stereotactic normalization transform (on the Normalized page). In case the analysis of the image series needs to be repeated, this transform can be loaded with the Apply Transformation button and applied to the image. As soon as the transform has been retrieved, it is applied to the patient's FDG image and the result shown on the Normalized page.
Starting Spatial Normalization
The stereotactic normalization is started with the Start Normalization button and may take up to 2 minutes.
In the extended mode it is furthermore possible to save the normalized patient images (on the Normalized page). These images contain the term NORMALIZED in the series description. The normalization of such images is not required, therefore a confirmation dialog window is shown when the user starts the processing:
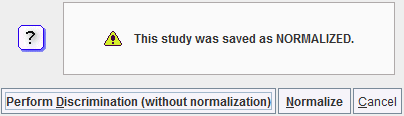
The user has to confirm with Perform Discrimination (without normalization) that the images are indeed the normalization result of an earlier PALZ analysis. In this case the spatial normalization step is skipped. Otherwise, the standard procedure can be continued with the Normalize button.