![]()
![]()
![]()
![]()
|
|
|
|
|
The Merge Frames tool allows combining image series with the same geometry into a joint dynamic series.
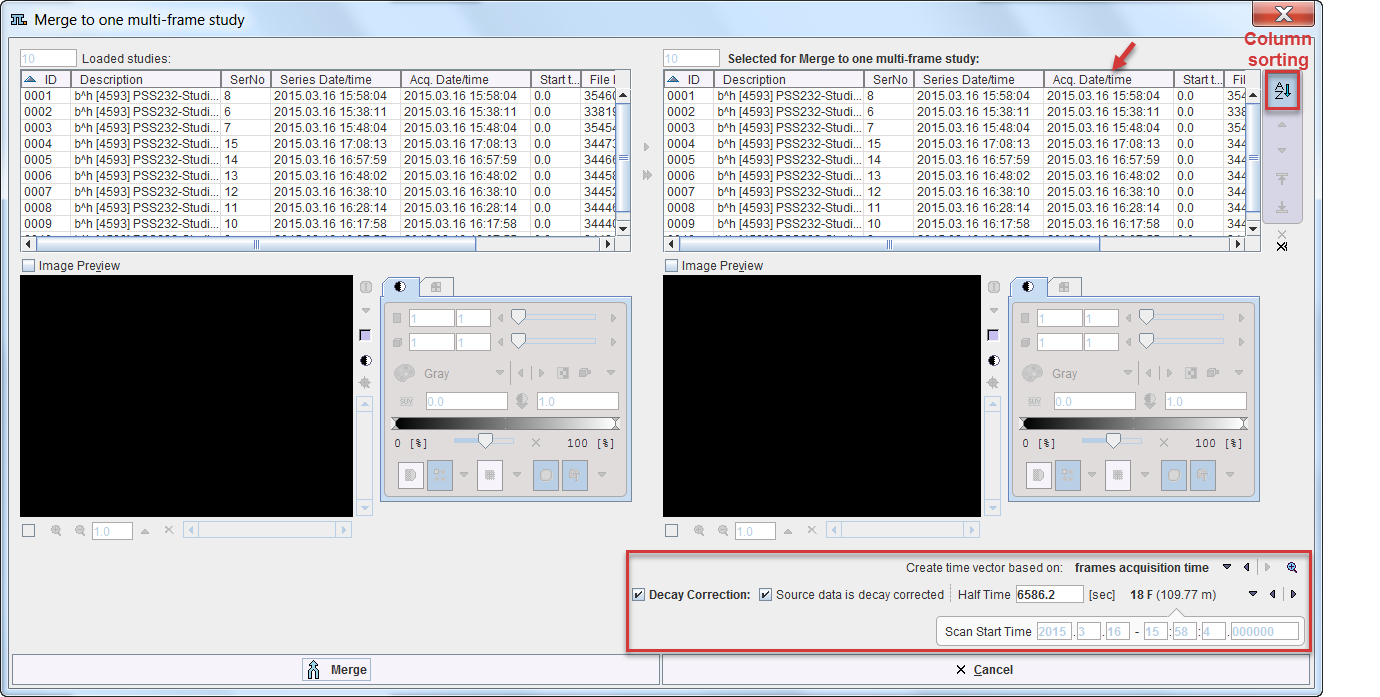
Activating Merge Frames opens a dialog window as illustrated below. The list in the upper left shows the loaded image series in loading order. The list in the upper right shows the image series which will be combined into a dynamic series. Initially, all series appear in sorted by Acq Date/time. The options related to applying decay correction during merging and generating the timing of the new dynamic series is located in the lower part.
Merging List Preparation
Series can be copied from left to right by double clicking in the left list, or selecting a list element and activating the arrow between the list. The double arrow copies all loaded series to the right.
The order of the Selected for Merge list can be modified by selecting a list element and shifting its position by the arrows to the right.
![]()
If the columns contain information which is suitable for sorting, the sorting button AZ can be enabled and sorting started by clicking into the column header. In the example above, the acquisition time was used for sorting the static series into the proper acquisition order.
Decay Correction Setup
When joining PET or SPECT data into a dynamic series, a consistent decay correction has to be ensured. Usually, such data is corrected to the acquisition start. Therefore, when joining static series into a dynamic series, later series have to be decay corrected to the start of the first acquisition by scaling them with a corresponding factor. The proper setting for this situation is to enable Decay Correction, confirm that Source data is decay corrected, and check that the isotope Half Time is correct. The zero time of the common decay correction of all series is indicated in the Scan Start Time field. Note that this information is indicative only and cannot be changed. It corresponds to the start time of the first series in the Selected for Merge list.

Dynamic Series Timing
The timing of the created dynamic series needs to be constructed for use in decay correciton. It can be specified using the Create time vector based on selection
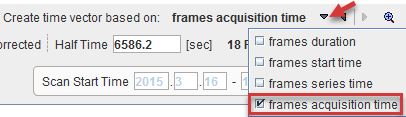
Please use the  buttom to inspect the time vector with the current selection. In the example below which was generated using frames acquisition time, there are gaps of about 40 seconds between the acquisitions. They occurred because the scanner had to be restarted for the subsequent whole-body acquisitions. Using frames duration, this information would have been missed.
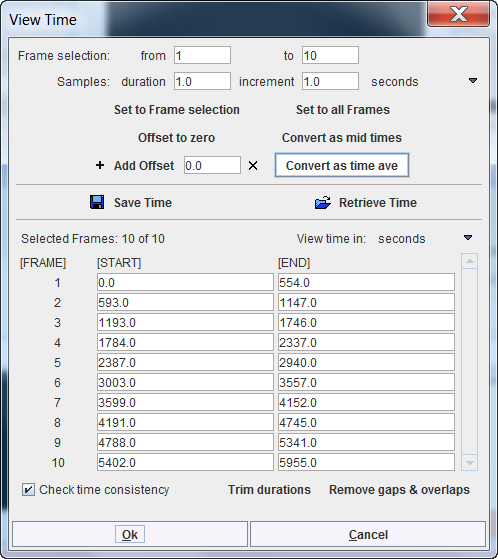
Processing is started with the Merge button. Before the new series is created and optionally decay corrected, the timing is displayed in a dialog window for confirmation and editing.
The Merge Slices & Stitching tool allows combining in the axial direction the selected studies to form a static series with extended coverage.
Activating Merge Slices & Stitching opens a dialog window as illustrated below:
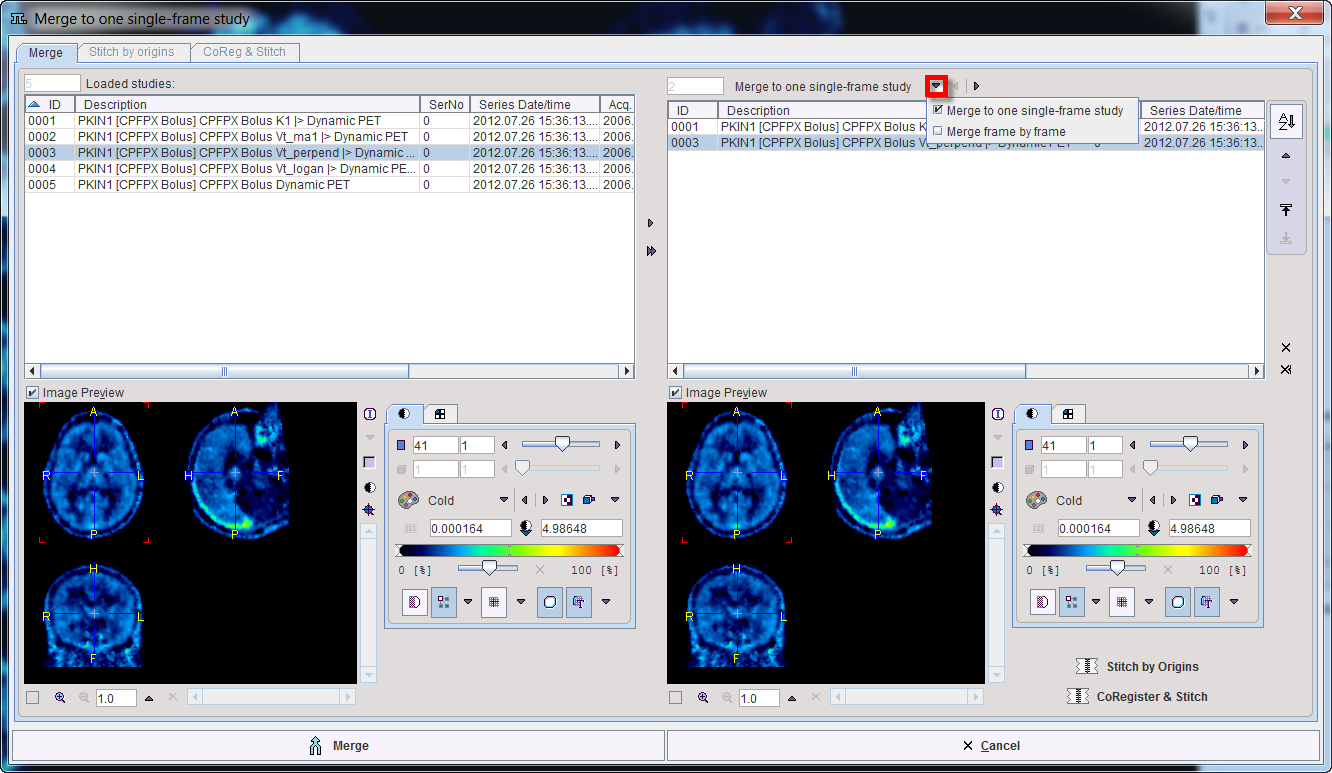
The list in the upper left shows the loaded image series in loading order. The list in the upper right shows the image series which will be combined into a static series with the current sorting order. Initially, all series appear in the original order.
Merging List Preparation
Series can be copied from left to right by double clicking in the left list, or selecting a list element and activating the arrow between the lists. The double arrow copies all loaded series to the right.
The order of the Merge list can be modified by selecting a list element and shifting its position by the arrows to the right.
![]()
If the columns contain information which is suitable for sorting, the sorting button AZ can be enabled and sorting started by clicking into the column header.
There are two options available for simple merging: Merge one single frame study and Merge frame by frame.
This function is only reasonable for image series covering adjacent axial fields-of-view such as in whole-body scanning.
Note that at least two studies have to be selected for merging.
Stitch by Origins
The procedure assumes the images have the same spatial frame of reference and merges them based on slices position. The first image in the merging list is set as reference.
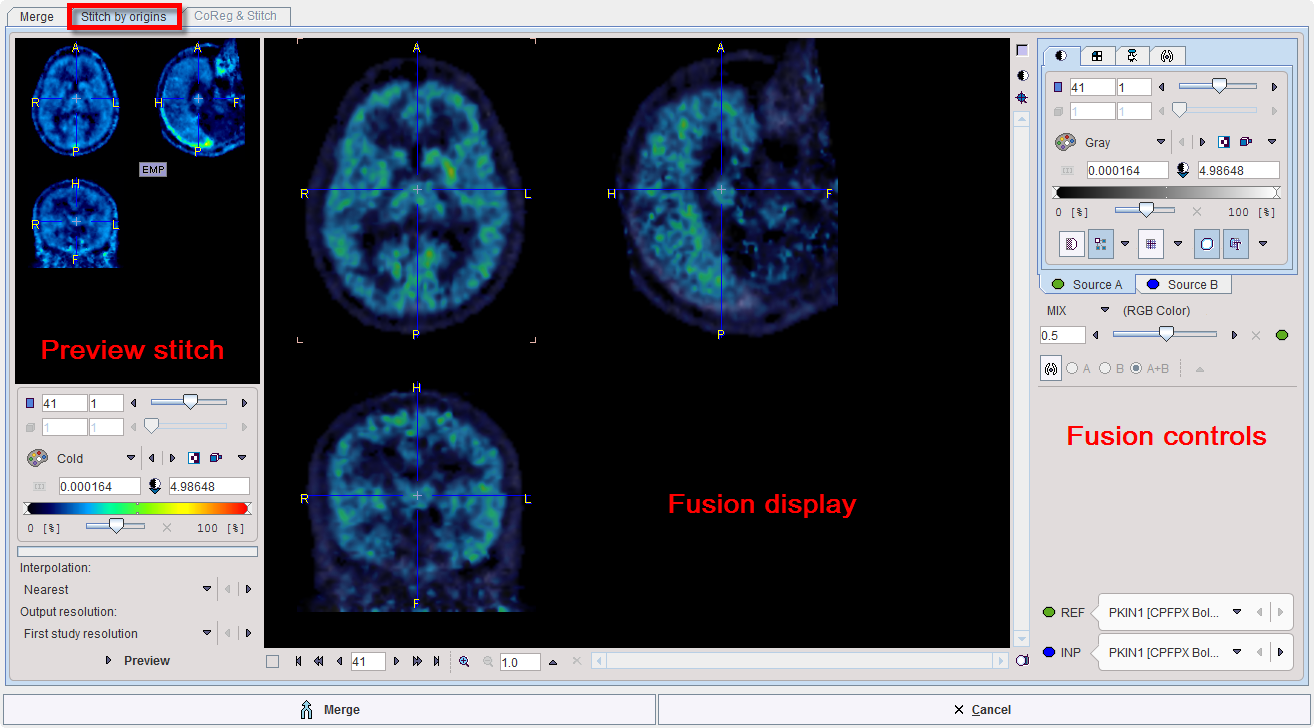
The interface is organized in 3 main areas:
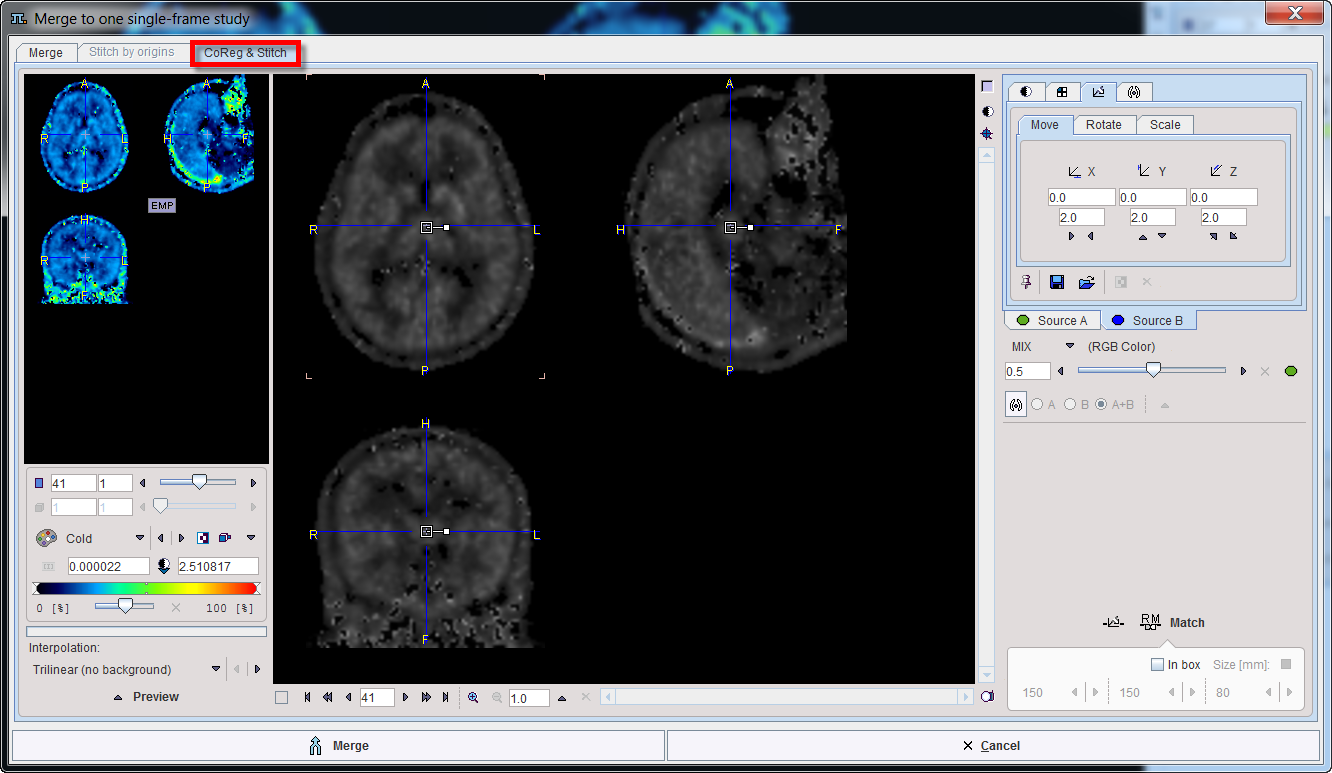
CoRegister and Stitch
The procedure can be applied for two images. It consists in a matching step followed by the merging step. Two types of matching are supported: the manual matching and the rigid matching procedure. Fore detail information about the matching procedures please refer to the Fusion guide.